Wired microphones
Get a vocal microphone from the cabinet
todo!
Wireless microphones
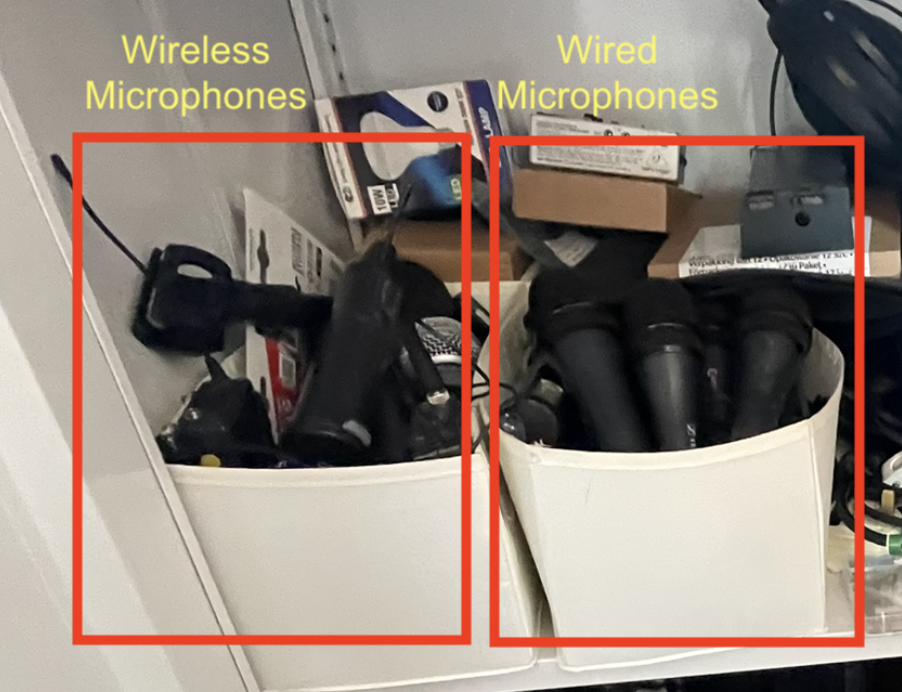 Wireless microphones should be stored in the left container.
Information about wireless microphones
There are currently two wireless microphone systems in place.
G4 System
Info
This system should be preferred. Only add the older system when you need more than two active microphones.
- The two receivers for this system are rack mounted inside the flight case.
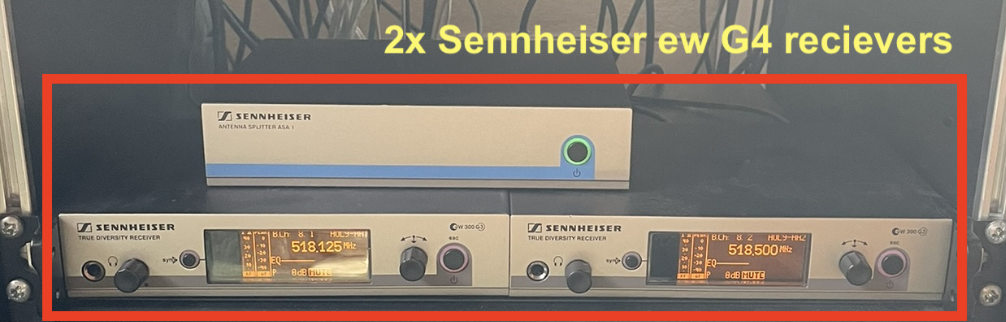
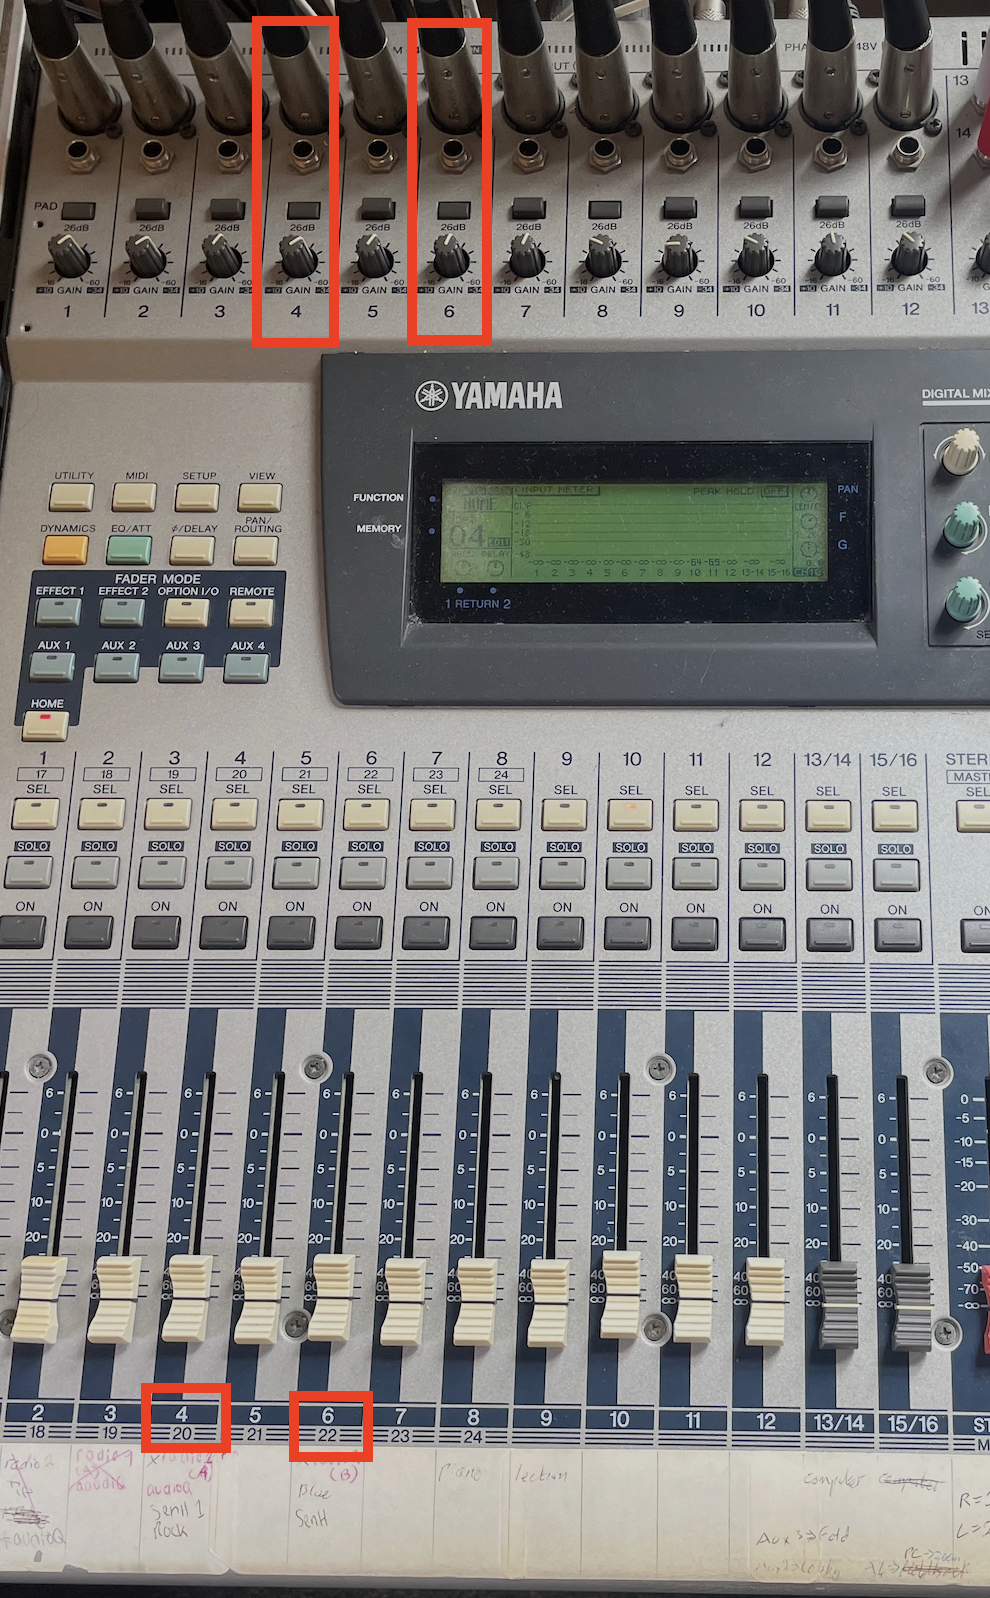
- They have two XLR outputs, which are connected to the mixing console on channels 4 and 6 respectively.
- There are two handheld and two bodypack (clip on mic) transmitters available, however only two can be used simultaneously due to the limited channels.
- All G4 microphones use AA batteries. There should always be some available in the cabinet.
G1 System
- The G1 system has one handheld microphone. It uses type D batteries. (9V)
- The receiver is located on a platform above the sound desk.

- The receiver has one TRS output, which is not usually plugged into the desk. The cable should be found on top of the desk somewhere (although it may have fallen down the back).
G4 system setup
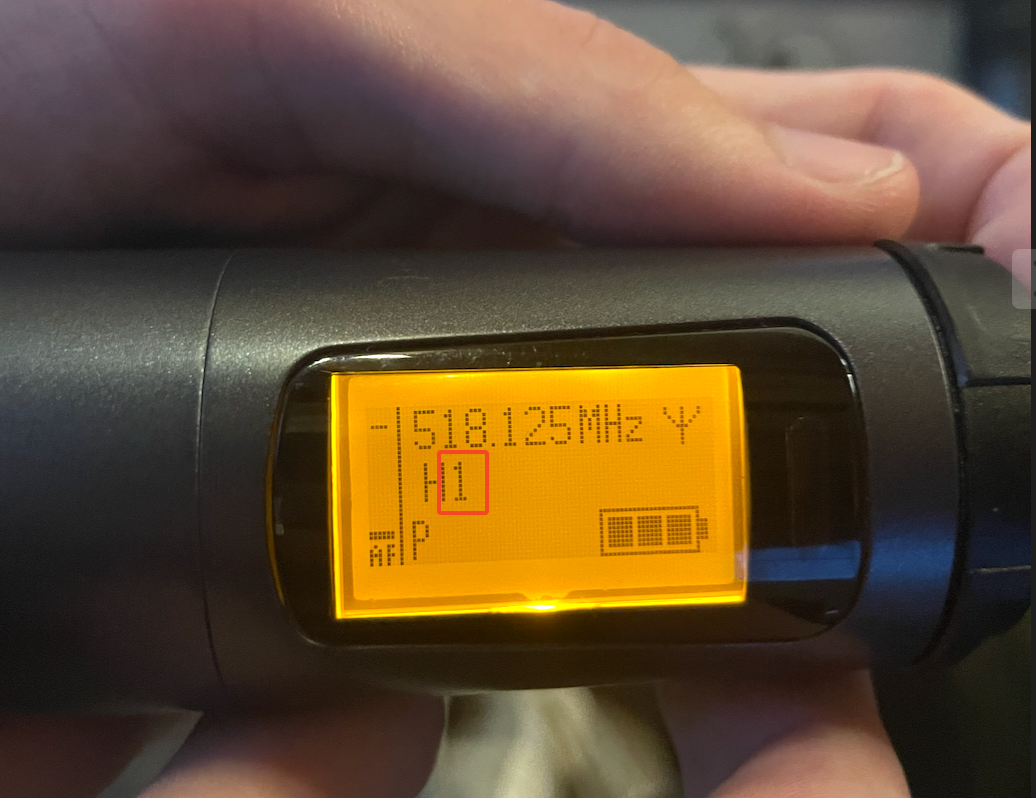
Handheld transmitter
- To switch it on, hold the red button on the bottom for a few seconds, until the Sennheiser logo appears on the display.
- If you are also using a bodypack microphone, check to make sure that their radio channel number (1 or 2) is not the same as this one. If so, switch to the other handheld mic.
- Check the battery display. If the battery is one block or below, consider replacing them, however if the microphone is to be used only for a short time you can skip this.
Replacing the batteries
- Unscrew the lower half of the microphone (not the pop filter at the top)
- Pull out the flap
- Replace the batteries
Mute button
The mute button reads “MIC” and is shown at the top. When the mic is live the button will glow.
- The microphones are currently set to RF Mute; when muted, they will fully disconnect from the receivers.
- This allows for greater battery savings when muted, however it means that the mic may take a short moment to reconnect after it is unmuted- please make sure the speaker is aware of this if they intend to use the mute button.
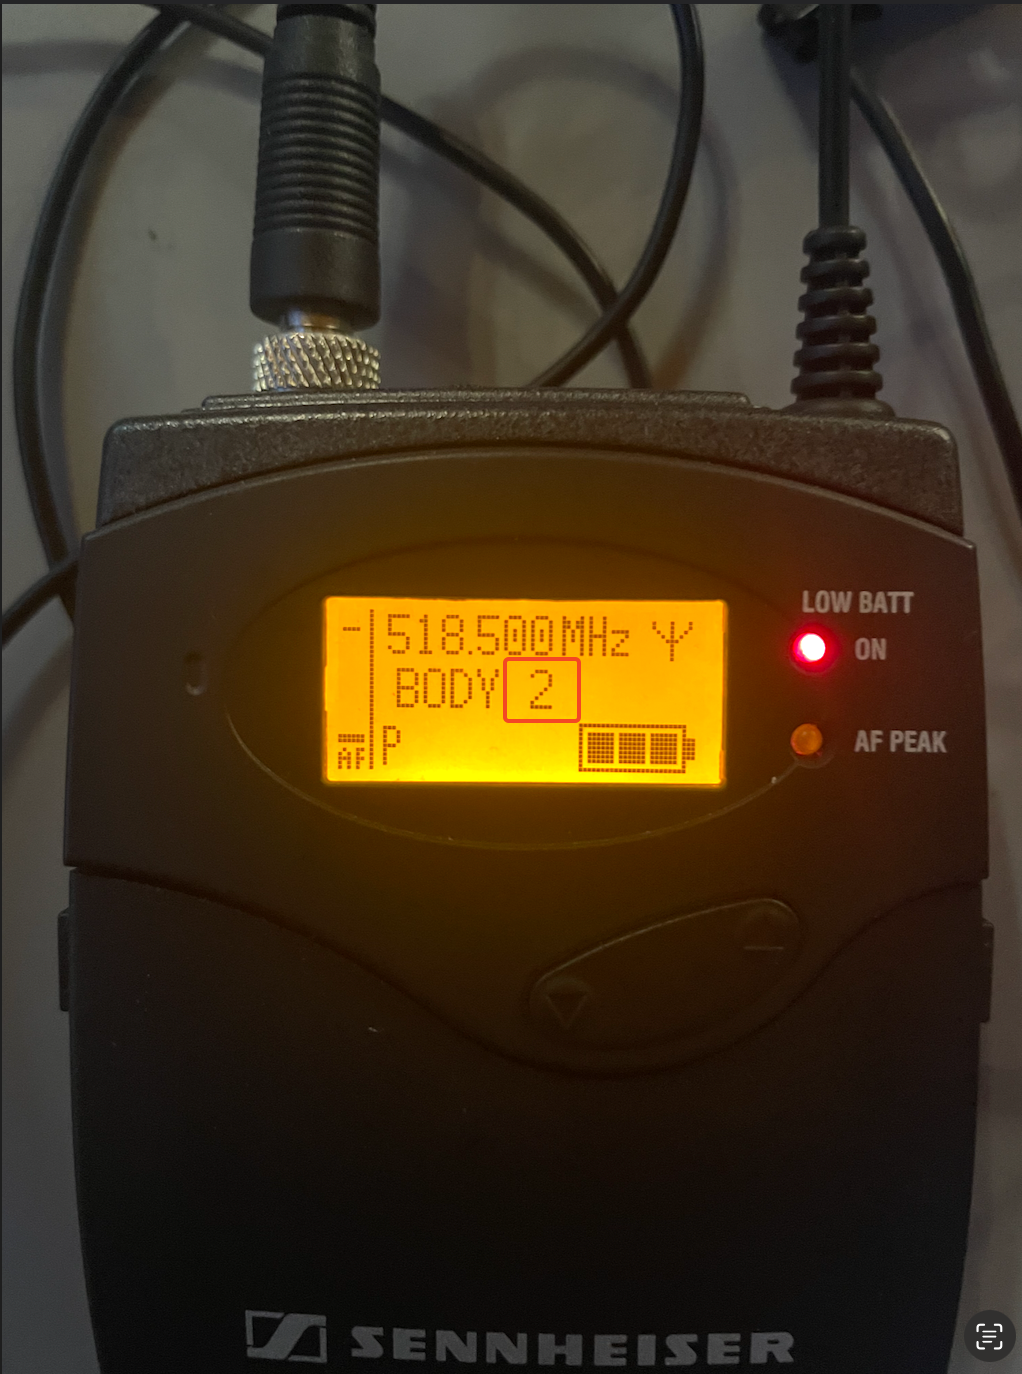
Bodypack (clip on) transmitters
Warning
The antennas on the bodyback transmitters are delicate and difficult to replace. Make sure you allow them to remain straight at all times. Do not hold the device by the antenna.
feedback, as the microphones need to be sensitive to pick up the user. Keep this in mind when adjusting gain; lower it if you begin to hear feedback.
Lapel microphones are especially prone to
- To switch it on, hold the two release buttons on opposite sides and pull outwards to open the battery compartment.
- Hold the ON button for a few seconds until the Sennheiser logo appears on the display.
- If you are also using a handheld microphone, check to make sure that their radio channel number (1 or 2) is not the same as this one. If so, switch to the other bodypack transmitter.
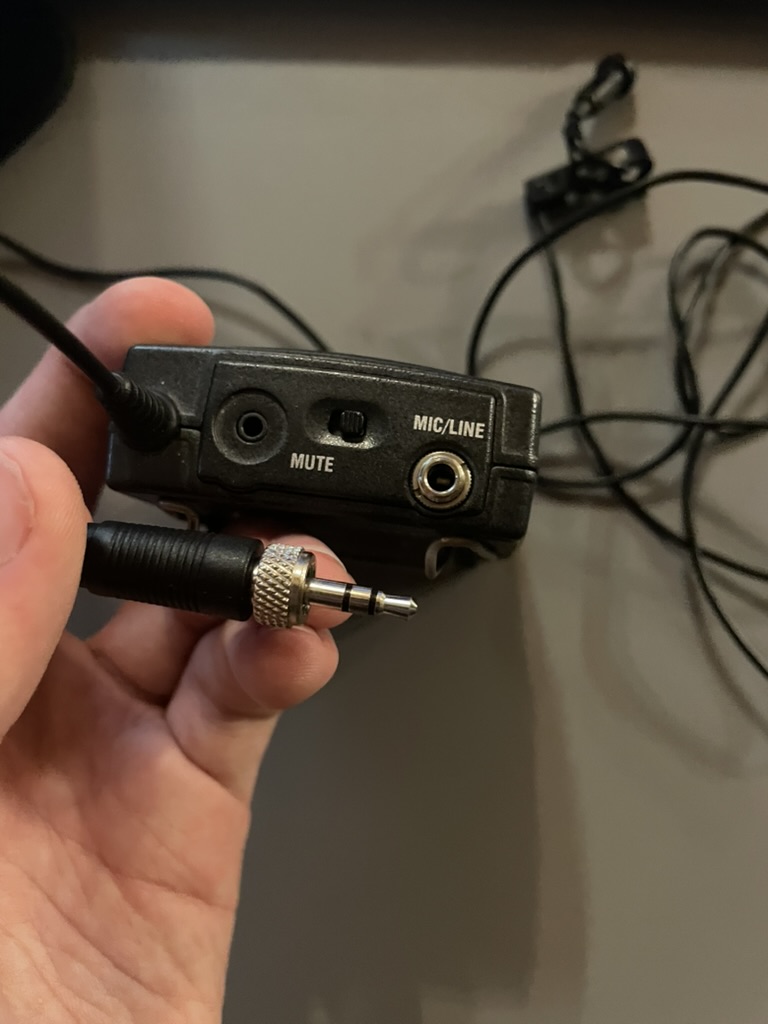
Adding / removing the microphone
- These transmitters use TRS microphones which are screwed into the mic input, labelled MIC/LINE. Unscrew/screw in the microphone.
Replacing the batteries
- The batteries are located inside the battery compartment.
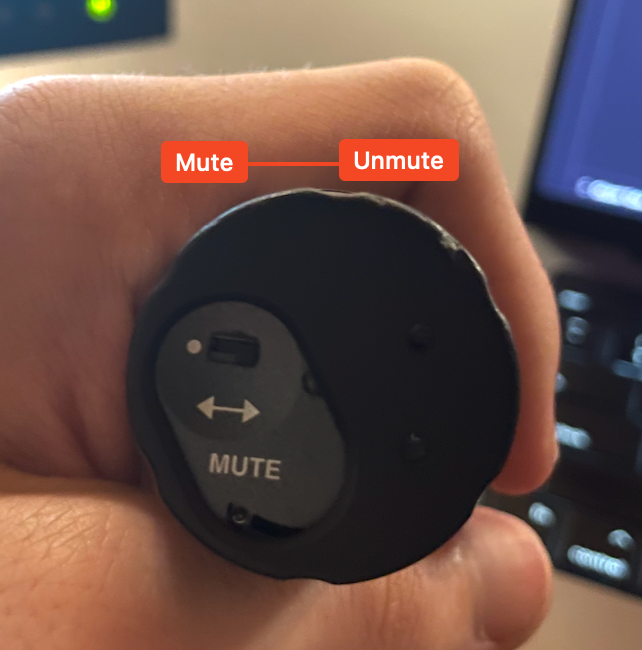
Mute switch
- The mute switch is located on the top. If you are getting no sound, make sure the mute switch is not on the side labeled “mute”.
- These transmitters are configured for RF Mute, so they fully disconnect when muted. Make sure the user is aware of this and allows for a few seconds after muting for the transmitter to reconnect.
General usage
- Because the receivers are powered devices, ensure the the PAD (-24dB) switch is pushed in to reduce the gain.
Warning
Do not touch the PAD switch while the channel is on; it will create a loud popping sound
- Set the fader on HOME to 0dBFS and lower the gain. You can increase the gain as the person speaks to find the correct level.
- [streaming only] On AUX 4, set the fader mode to POST and set it to 0dBFS or above to ensure they are audible and loud on the stream.
G1 system setup
Info
Prefer to use the G4 system. Only use this system when both G4 channels are used up.
Warning
The G1 system can often pick up interference while the transmitter is switched off. Make sure the channel is never switched ON without the transmitter also turned on.
- Find the silver TRS cable plugged into the receiver. (it may have fallen down the back of the desk so check there if you can’t find it)
- Choose a free channel mixer channel and plug it in.
- Unplug the XLR of the channel you choose
- Reduce the gain on the channel.
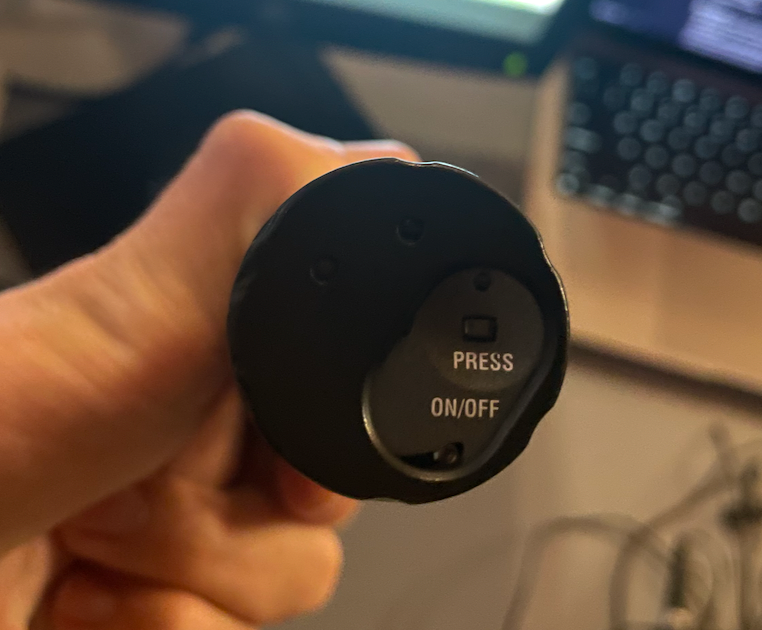
- Switch the transmitter on.
- The on button can be found on the bottom. You may need to rotate the disk on the bottom to reveal the button.
- Hold the button briefly. The power light will turn on.
No audio?
- This microphone does not show anywhere if it is muted. Slide the disk on the bottom and check that the mute switch is disabled.